DocFusion's REST connector allows you to use stateless web services as data sources for your document templates. It automatically builds your template's data structure from the response to an API request. The REST connector caters for several authentication methods, including OAuth 2.0 using Client Credential Flow.
The REST connector can be configured with or without API descriptor files (Swagger files). When descriptors are available though, DocFusion will simplify the setup for you by auto-populating configuration information and adjusting the options accordingly.

Also included is the facility to preview the request and response data, along with log-messages to help setup or diagnose the connector during template design-time.
To add a REST connector to your template's data model, follow the steps in this guide.
Add a new Schema property
Begin by opening your template's Data Model in Template Designer. In the toolbar, click the Edit Entity command to open the to open the Schema Properties window.
Now, add a schema property by clicking Add Property in the toolbar. This opens the Create Property on Schema dialog.
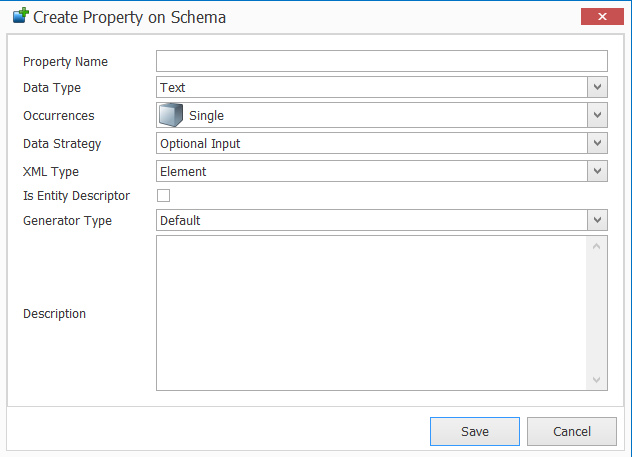
First, give the REST connector property a name by entering one in the Property Name field.
Don't add any spaces to the name.
Set the Data Type to Text.
Next, select the Multiple option in the Occurrences dropdown.
And, for the Data Strategy, select Smart Value. This options in the dialog will be adjusted accordingly, as follows:
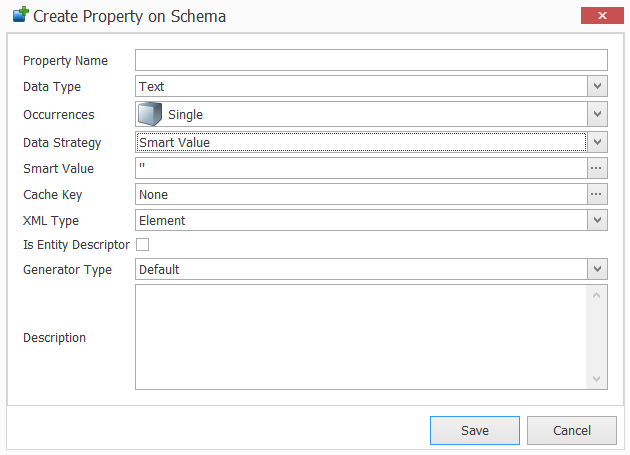
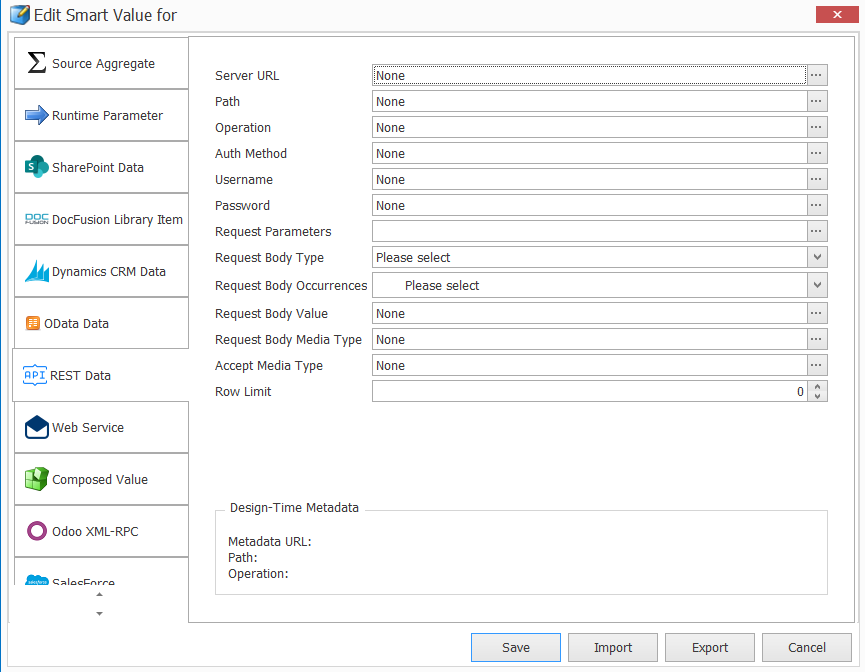
Now, click the ellipsis alongside the Smart Value field to open the Edit Smart Value window. In the list of smart values on the left, select REST Data to open the REST configuration dialog. You may need to scroll using the arrow at the bottom to find it.
Next, you'll configure the REST connector.
Configure the REST connector
First, enter the Server URL by clicking the ellipsis alongside the field. This allows you insert a Constant value. Click Save to return to the connector configuration.
Next, enter the Path in the same way. Click the ellipses alongside the field to enter a Constant value and click Save when you're done.
The value of the path will be appended to the Server URL.
Now, click the ellipsis alongside the Operation field to select the REST operation, e.g. GET, POST, etc. Return to the connector configuration by clicking Save.
Select the Authentication Method. DocFusion caters for several ways to authenticate:
- Basic Authentication: Username and password is required to authenticate.
- OAuth2.0 Client Credential Flow: Retrieves a JWT access token (JSON Web Token) to perform requests with.
- Anonymous Authentication: Authenticates if the REST service allows anonymous connections.
The configuration options in the REST connector configuration dialog will adjust according to your selection.
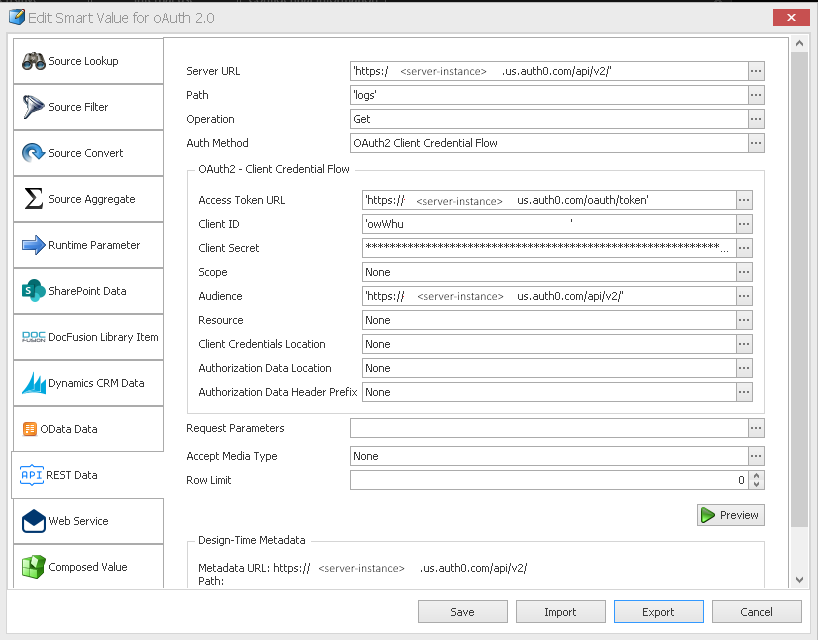
For the OAuth 2.0 Authentication Method, select OAuth 2.0 / Client Credential Flow from the dropdown. Once you select it, the OAuth 2.0 parameters will become available, as follows:
Provide the authentication details
To authenticate:
- Begin by entering the Access Token URL. Click the ellipses alongside the field to open the editor.
- Next, enter the Client ID and Client Secret.
- Also provide the Scope (if available),
- And the Audience (a URL).
Hover your cursor over each parameter for useful hints.
At this point, you've met the mandatory requirements to invoke an authentication request. You can continue to the next step, Customizing the Request Parameters. If, however, the OAuth server requires the remaining parameters for the client credential flow, here's how to configure them:
(Optional) Advanced Settings
- The Client Credential Location is where the OAuth2.0 server expects the Client ID and Secret to be stored when requesting an access token. The default is the request header, but you can also set the location as the body.
- Authentication Data Location refers to where the access token (JWT bearer token) is expected to be stored. Again, this can be set to either the header or body of the request. The default is the header.
- You can also specify a custom Authentication Data Header Prefix if an Authentication Data Location was set. This indicates a custom prefix for the OAuth2.0 server to locate the access token. This isn't common practice, but DocFusion provides the facility for when it's necessary.
Client ID, secrets and bearer tokens are Base64 encoded by default. Access tokens are sent with each request to manage security.
Customize request parameters
Add any request parameters by clicking the ellipsis alongside the field. For each new request parameter, set:
- the Parameter Name expected by the service,
- and it's Value,
Click Save when you're done to return to the REST configuration window.
Verify the response types and properties
You can now verify the connection and that authentication using the REST connector is working correctly. You'll do this by using the Preview button, which executes the request to the API endpoint using the authentication credentials you supplied.
Click the Preview button. The REST Preview window opens.
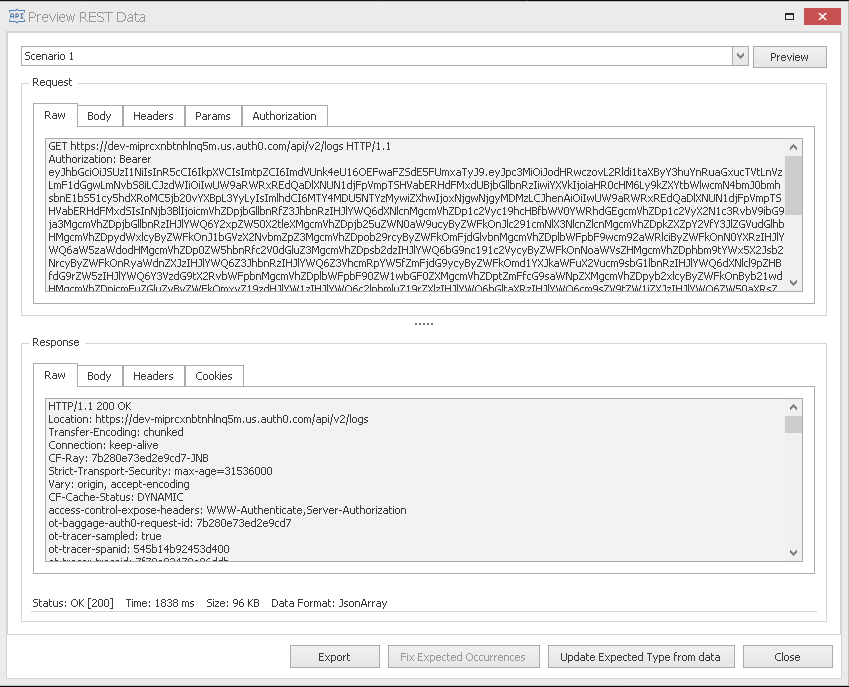
The Request and Response sections show the data that was sent and received respectively. Use the tabs to navigate between the raw and formatted data in the header, body, and other sections of the request.
The Status information at the bottom of the window helps you to verify that the request was executed as expected. The preview informs you of:
- The HTTP return code,
- Time to execute the request,
- The transmission package size.
- And if there are any messages, they will be displayed here too.
Successful requests are usually indicated with an HTTP status code of 200. This verifies that you successfully connected to the REST service, were authenticated by the relevant OAuth2.0 provider, and received a response from the server.
Configuration of the REST connector is now complete. The next step verifies property additions to your template's data model
Verify the new REST schema properties
Based on the request data received, DocFusion automatically creates a structure of properties in your template's data model.
Open your template's data model if it isn't already open by clicking Data Model in the ribbon bar. Schema properties that match the return data from the REST connector will be added.
Here's an example:
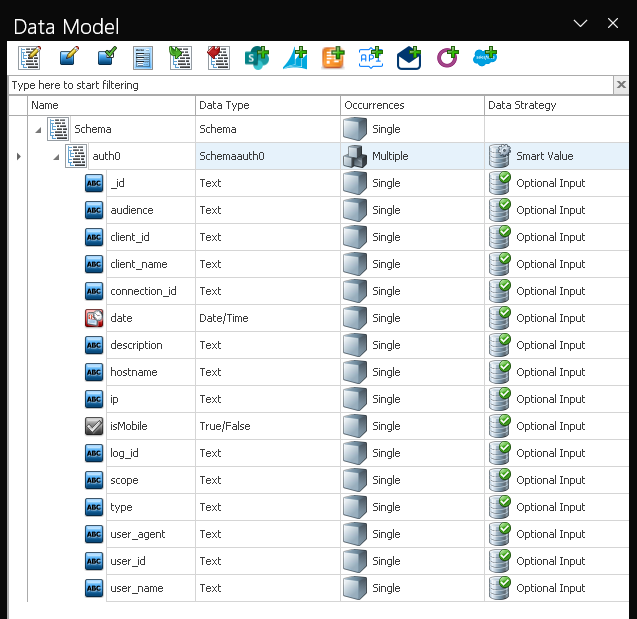
Notice that the properties are created for you by the REST connector, along with data types, occurrences and relevant data strategies.
Diagnosing REST Errors
If you're experiencing errors while setting up REST connections, you can interrogate the template generation logs by clicking Validate command in Template Designer. Log-entries that record the progress and state of the REST connector are displayed there.
For security reasons, design-time logs are purged when templates are used in the production environment.