Follow the steps in this guide to configure Azure Active Directory (AAD) for DocFusion. This enables the server configuration for users to login to DocFusion using their Microsoft accounts.
There are two parts to this configuration:
- Register an Azure Active Directory application.
- Configure IDS
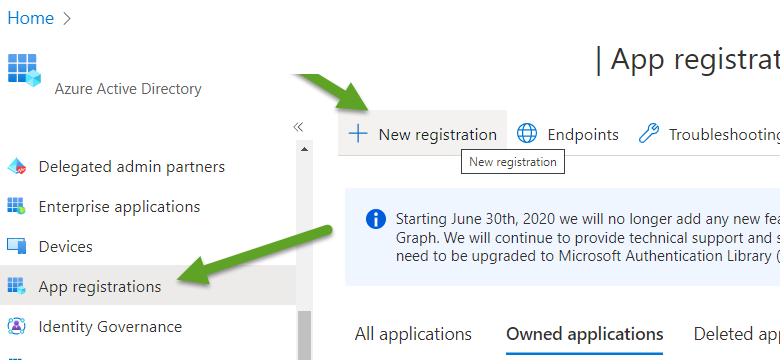
1. AAD App Registration
Now, click New Registration. You will be directed to the Register an Application configuration screen.
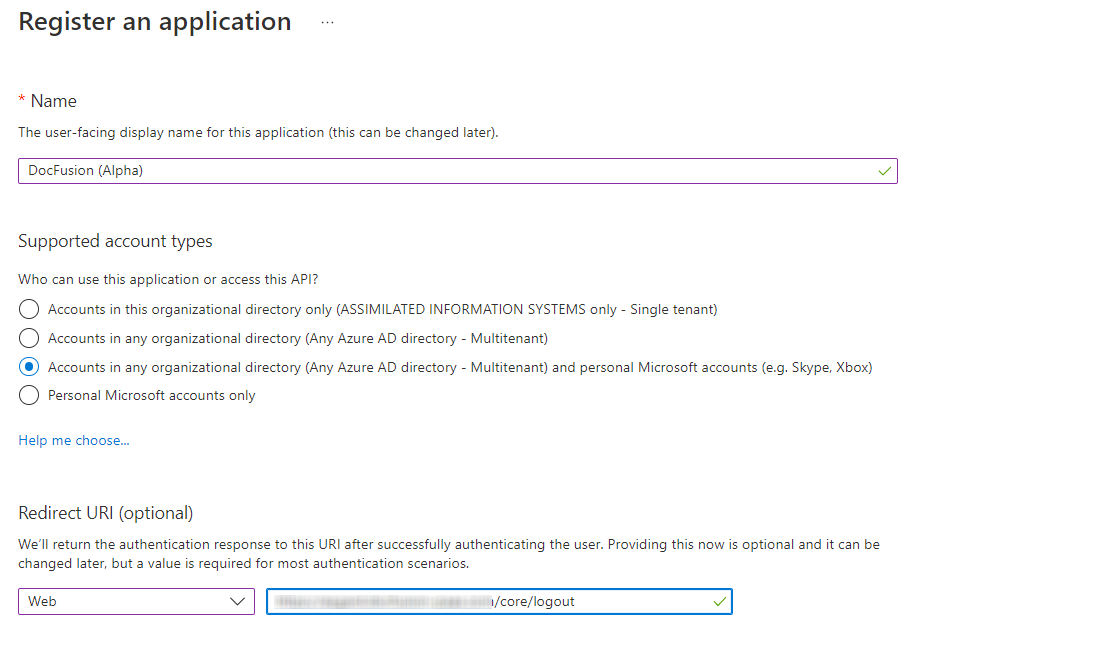
When the Register an Application screen opens:
- Give the application a name, e.g. DocFusion
- From the Supported Account Types options, select "Accounts in any organization directory (Any Azure AD directory - Multitenant) and personal Microsoft accounts (e.g. Skype, Xbox)"
- Select 'Web' as the Redirect URI type,
- Then enter the Redirect URI in the following format: https://[your-DocFusion-instance]/core/logout
Now, click Register.
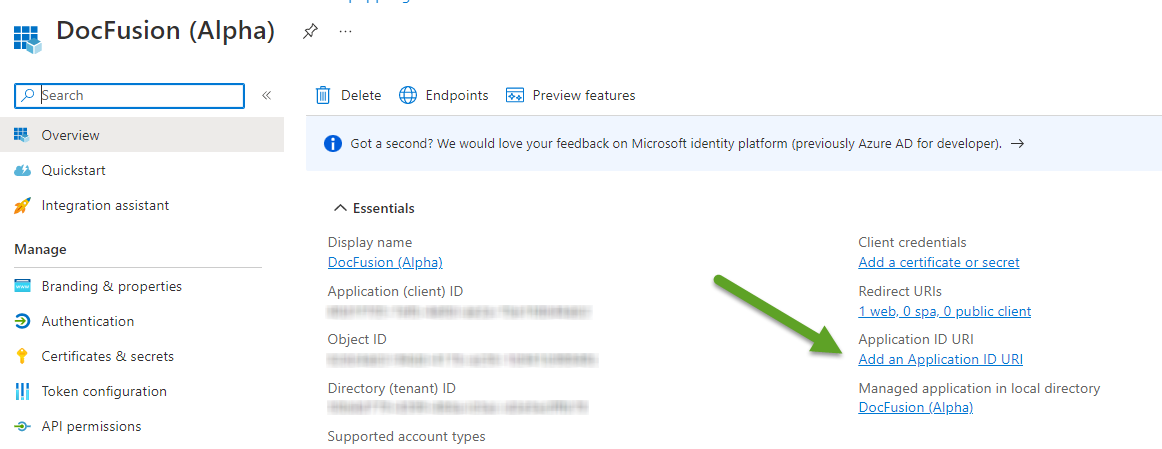
2. Add an Application ID URI
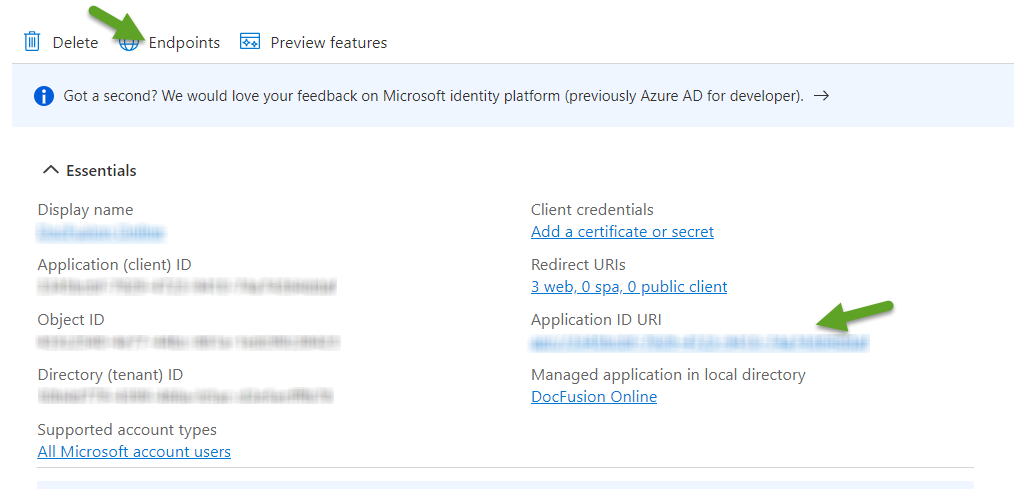
Navigate to the Overview tab and click Add an Application ID URI.
Now, click Set.
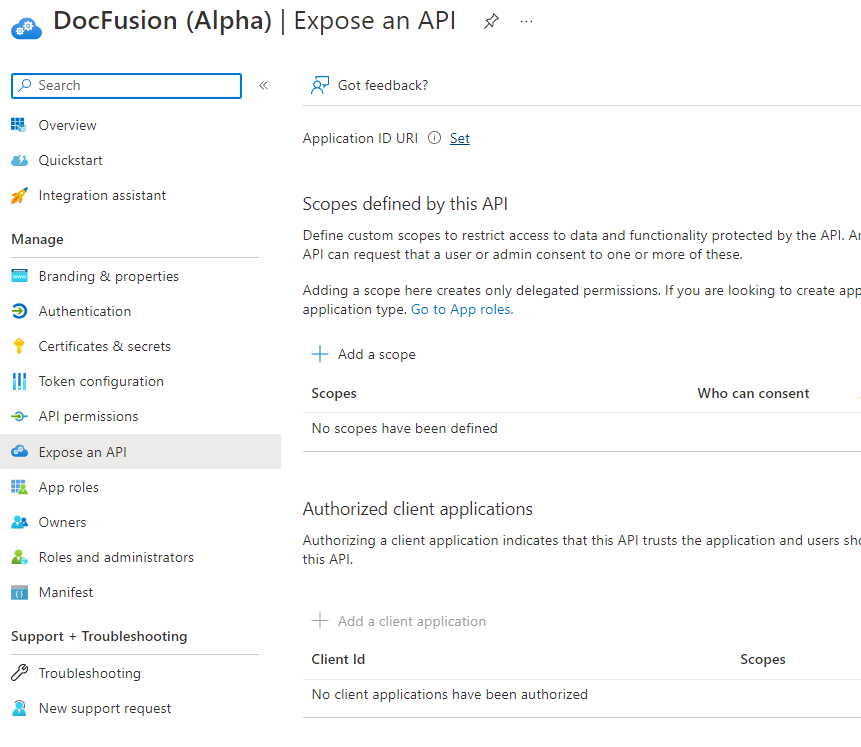
This shows the generated ID URI, Select Save.
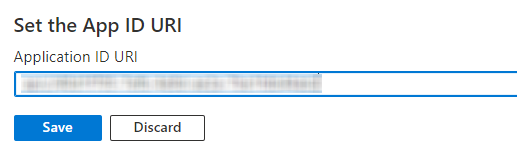
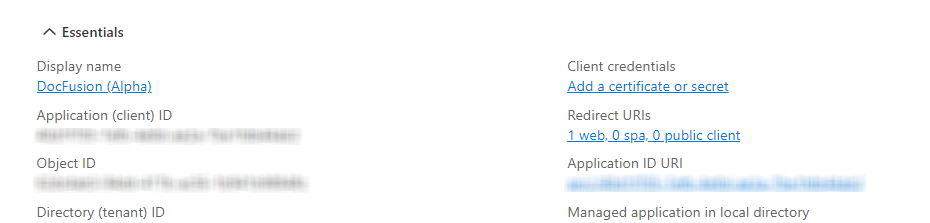
The ID URI can now be viewed on the Overview tab. It will be used as the realm for IDS configuration so copy it now.
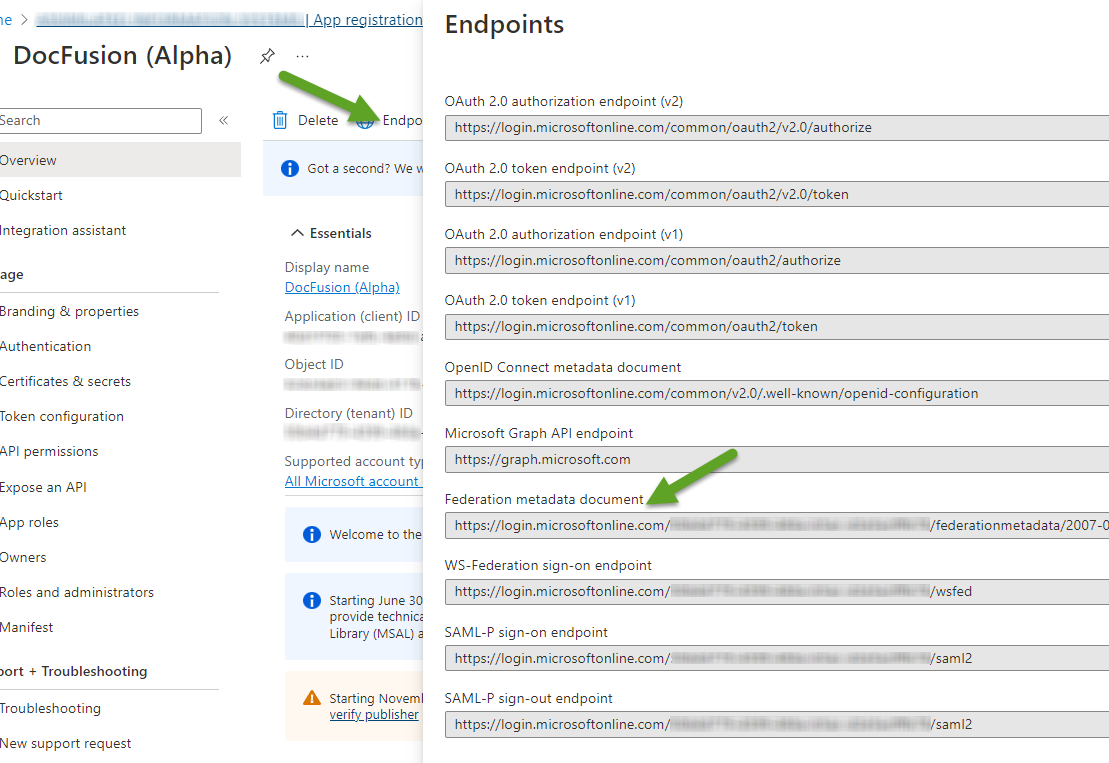
Click on Endpoint to copy the Federation metadata document endpoint used for IDS configuration. It will be used as the MetadataDocument exchange endpoint (i.e: https://login.microsoftonline.com/xxxxx/federationmetadata/2007-06/federationmetadata.xml)
3. IDS Configuration
The configuration for the external identity providers is configured as an array of items containing the type,name, metadata endpoint address and realm. It is stored as a base64 encoded string in the ApplicationParameters.xml file under the ISW_ADFSServers key.
4. Using the IDS manifest configuration utility
Run the configuration utility, then open the correct manifest and parameter files.
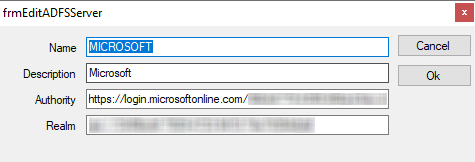
Navigate to the ADFS tab. Click Add to create a new entry, or Edit on an existing one.
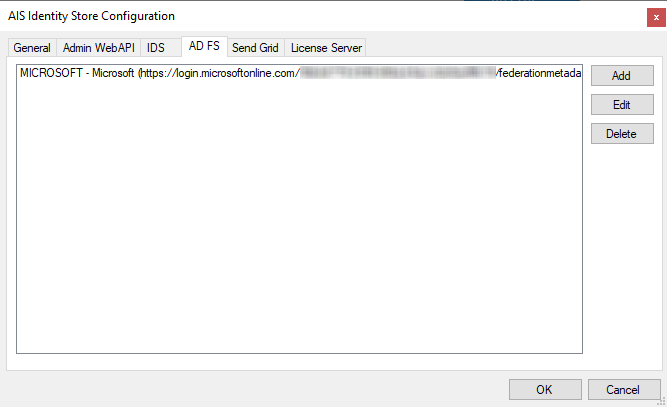
Populate the values:
- Name: Name of the given provider.
- Description: Description of the given provider.
- Authority: Federation metadata document Endpoint (NB: found in Azure portal)
- Realm: ID URI of the registered App (NB: found in Azure portal)
5. Manually update the Application Parameters
Create a text structure that resembles the following:
[{"AuthenticationType":"MICROSOFT","Caption":"Microsoft","MetadataAddress":"https://login.microsoftonline.com/xxxxxxx/federationmetadata/2007-06/federationmetadata.xml","Wtrealm":"api://xxxxxxxx"}]
6. Finalization
- Convert to base64.
- Update the Application Parameters: <Parameter Name="ISW_ADFSServers" Value="THE BASE64 TEXT"/>
- Redeploy IDS
When logging on to DocFusion via IDS, the Continue with Microsoft option will now be visible.

7. Configure the Business Unit to allow AAD user access
To configure users to login using AAD, you must complete the following steps:
- Whitelist the 'Microsoft\' domain. Follow the steps in this guide...
- Configure users to login using AAD. Follow the steps in this guide...
Users should now be able to logon using AAD if rights have been assigned.
Confirm usernames in the Workbench status bar.