This tour of Workflow Designer helps you to navigate the application interface and understand the feature-set that supports the building of document automation workflows. It also explores advanced features like variables, arguments and test functionality.
Need an overview of Workflow Designer? Read this guide...

Find Workflow Designer
Workflow Designer is tool included in DocFusion Workbench. To access it:
- Open Workbench from the Windows app drawer,
- Select an existing workflow, or create a new one, and then edit it from the Items menu.
- When prompted to use the Process Designer, click Yes. This opens Workflow Designer.
Interface Tour
Orientate yourself by identifying the 4 main panels that make up the Workflow Designer interface:
- Canvas: The central working area on which you arrange workflow activities in a sequence.
- Toolbox: Categorized sets of workflow activities that can be dragged onto the canvas and customized.
- Properties Pane: Allows you to view and customize the settings of individual workflow activities.
- Data Handling Tools: The bar at the bottom of the canvas opens when clicking on it, and allows you set variables and arguments, or import reference libraries into your workflow.

Additionally, the status bar in the footer of the application window displays status information that's useful to identify when the designer is busy processing or ready for input.
Let's have a look at each pane in detail:
The Canvas
By default, Workflow Designer creates a default sequence of activities that generate a document from a template. This workflow acts as a starting point and can be customized.
Notice though how all the workflow activities are arranged in a sequence. This is the order in which each activity in the workflow will be executed. You can drag-and-drop activities to customize the order, and selecting any activity reveals its properties in the Properties Pane.
Clicking an activity collapses or expands it to display its settings. Using the Collase All, Expand All and Restore functions in the top-right of the canvas, you can control you view and quickly make adjustments to workflow activities.
Also available are navigation tools for longer workflows. In the Programmatic Toolbar below the canvas you'll find:
- A Panning Hand, which allows you to move around the workflow instead of only scrolling up and down with your mouse.
- Zooming tools that sets the zoom to a specific percentage or fits the entire workflow in the available screen space.
- And an Overview tool, which opens a navigable thumbnail window that locates you at any point in the workflow.

Toolbox
The Toolbox is where you'll find all available workflow activities. They are grouped by function and can also be filtered using the Search Bar at the top. To use a workflow activity, simply drag it onto the canvas and drop it into position.
You can also pin the panel to keep it visible, or collapse it into a sidebar that opens on hover to create working space on the canvas.

Properties Pane
Selecting any workflow activity on the canvas reveals its properties in the Properties Pane. Here you can customize settings, search and order them. Editable fields have an ellipses ('...') button alongside to open the editor in which you can change the property values.
All activities also have a DisplayName property that labels it on the canvas so that you can identify each more easily.

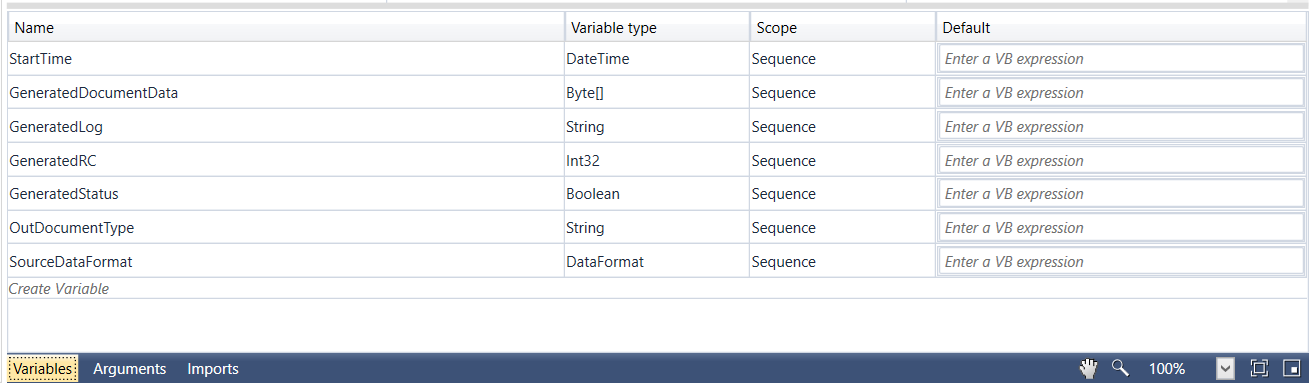
Data Definitions
The set of data handling tools that are accessed by clicking the toolbar at the bottom of the canvas allows for data inputs and outputs for workflows. There are 3 tools:
- Variables: Add or remove variables for workflows, their data types and scope.
- Arguments: Allows you to provide inputs for arguments to DocFusion's API endpoints when running workflows, and receiving responses.
- Imports: The referencing of external libraries to assist workflows.
The Data Handling Tools can be opened and collapsed on-click, and you can also adjust its height using the draggable border at its top. The canvas zoom and panning tools are also located in the toolbar, in the right corner.